

Installation and configuring of MeetMe Bitrix24 app
Thank you! Your submission has been received!
Oops! Something went wrong while submitting the form.



Installation:
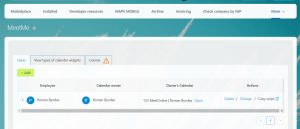
Configurations:
Go to the MeetMe app from Market tab in your portal.
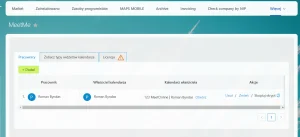
2. On the Users tab, add a person from the portal with whom you can schedule meetings.
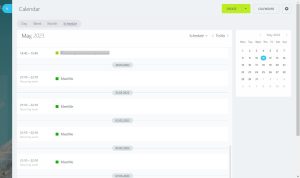
After adding a user, two calendars per Owner are created and access is granted to the employee:
MeetOnline is a calendar that will display the time already booked by the client for the meeting.
(set) MeetOnline is a calendar that sets free time slots for meetings with a client.
3. After saving, it becomes possible to configure some options for a specific calendar.
– Employee (First column) – the person who will directly use this calendar
– Calendar owner (Second column) – an employee who has access to calendar editing (can add time slots, change them, etc.). By default, the first and second columns are the same, but if necessary, you can separate the access rights by clicking Change on the right side of the row.
– (Third column) title and link to the calendar. The owner’s calendar opens.
– Change employee or calendar owner;
– Change widget settings:
a) Change the name of the calendar
b) Specify the type of widget that suits you
c) Select widget location
d) Specify the period of days that will be displayed for booking
e) Customize the widget color (background color, date, time zone)
Useful: You can see, try on how the widget will look in the next tab “View Calendar Widget Types”, and simply transfer these settings to the calendar settings of a particular employee.
You can add the name of the event and a description to it (for example, individual consultation or diagnostics, etc.)
Check the box if you want the employee to receive notifications upon successful booking, enter the text of the notification (you can add a quick link to the client’s contact).
In the “Settings” column, you can also delete the employee’s calendar.
After editing, copy the script and paste it under the Bitrix24 form script:
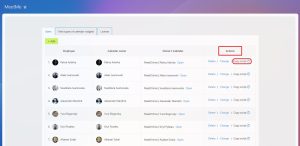
Step 1. Copy the script
If your website is made on the Bitrix24 constructor:
Step 2. Go to the Website you need and add HTML Block (under the block with the CRM form)
Step 3. Fill this block with the script, save and publish website.
If your site is NOT made on the Bitrix24 constructor:
Step 2. Insert the Bitrix24 CRM form script into your website code (CRM – More – Add-ons – CRM forms – select the one you need and copy the code)
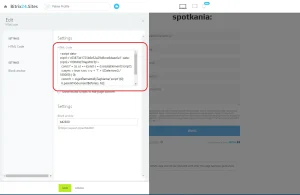
Step 3: After the form code, copy the widget script from the application (see Step 1) and paste it below.
How to add time slots in the calendar so that the client can make reservations?
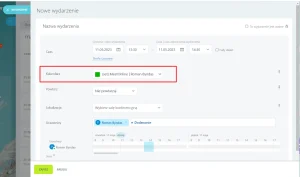
Add a new event to your calendar. The topic can be anything.
Select the time that you want to add to the calendar for booking.
*When choosing a calendar, be sure to select your calendar -(set) MeetOnline.
If it is necessary to repeat the slot of this time several times, then select “Repeat”.
After saving time slots in the (set) MeetOnline calendar, the specified slots will appear on the reservation page.
Attention: If you specified in the settings that the widget is placed on top of the form, then it is important to add the application field on top in the form itself. Otherwise, the application may not work correctly!
Once a client has booked a time for a meeting, an event will be added to your calendar.
Bookings go to the CRM section Clients.
In the client card, you will also see new fields (automatically added when installing the application):
– meetMeTZClient – client timezone as a string
– meetMeTZClientOffset – client time zone offset in seconds
– meetMeDateClient – client date
– meetMeTzBitrixOffset – timezone offset in slot settings, in seconds
– meetMeTzBitrix – time zone in slot settings, string
– meetMeDateBitrix – Bitrix24 start date, in slot settings. Also this field must be inserted in the form
– meetMeDateToBitrix – end date in Bitrix24, in the slot settings.
– meetMeIdEmployee – employee id
– meetMeIdOwner – calendar owner id
– meetMeIdCalSet – calendar id for creating slots
– meetMeIdCalMeet – calendar id for creating meetings
and an Action is created.
1.Go to the Booking tab
2.Define basic settings
3.Select the type of booking
1.Go to the “Catalog settings” tab and select the desired catalog
2.Add the necessary fields for displaying
3.Selecting products for booking
1.Create a time slot for which you want to enable reservations
2.Select an item to access the booking calendar Booking/Catalog Settings tab
3.Select the “Booking” option to open the booking calendar
4.Select a previously created slot to reserve a time slot
1.Go to the View Calendar Widget Types tab and select Booking
2.Click the “Booking” button to preview the widget.
3.To connect the widget
Go to Employees → Actions/Change → Widget Type/Booking
1.Customers get to the form
2.Selection of the required slot takes place
3.After confirmation, a transaction is created and notifications are sent to the responsible people. The client can also receive an automated confirmation email with an .ics file to add the meeting to their personal calendar (Google, Outlook).
1. Find the app in the Bitrix24 Market by search or using a link.
Configurations:
Go to the MeetMe app from Market tab in your portal.
2. On the Users tab, add a person from the portal with whom you can schedule meetings.
After adding a user, two calendars per Owner are created and access is granted to the employee:
MeetOnline is a calendar that will display the time already booked by the client for the meeting.
(set) MeetOnline is a calendar that sets free time slots for meetings with a client.
3. After saving, it becomes possible to configure some options for a specific calendar.
– Employee (First column) – the person who will directly use this calendar
– Calendar owner (Second column) – an employee who has access to calendar editing (can add time slots, change them, etc.). By default, the first and second columns are the same, but if necessary, you can separate the access rights by clicking Change on the right side of the row.
– (Third column) title and link to the calendar. The owner’s calendar opens.
Installation:
1. Find the app in the Bitrix24 Market by search or using a link.
Configurations:
Go to the MeetMe app from Market tab in your portal.
2. On the Users tab, add a person from the portal with whom you can schedule meetings.
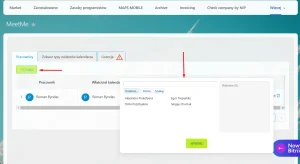
3.Dodaj nowego pracownika, dla którego chcesz utworzyć kalendarz. W razie potrzeby wybierz wielu pracowników.
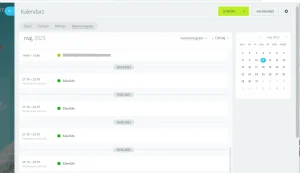
Ważne! Podczas dodawania pracownika generowane są 2 kalendarze:
– Calendar Set to kalendarz, w którym właściciel kalendarza dodaje dostępne przedziały czasowe do rezerwacji, spośród których klient wybierze termin spotkania.
– Meet Calendar to kalendarz spotkań zarezerwowanych przez klientów.
– Zmień pracownika lub właściciela kalendarza;
– Zmień ustawienia widżetu:
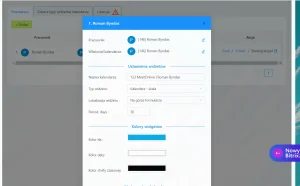
a) Zmień nazwę kalendarza
b) Określ typ widżetu, który Ci odpowiada
c) Wybierz lokalizację widżetu
d) Podaj okres dni, które będą wyświetlane dla rezerwacji
e) Dostosuj kolor widżetu (kolor tła, data, strefa czasowa)
Przydatne: Możesz zobaczyć, wypróbować jak będzie wyglądał widżet w następnej zakładce „Wyświetl typy widżetów kalendarza” i po prostu przenieść te ustawienia do ustawień kalendarza konkretnego pracownika.
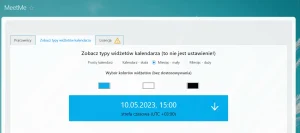
Krok 1. Skopiuj skrypt
Jeśli Twoja witryna jest zbudowana na konstruktorze Bitrix24:
Krok 2. Przejdź do strony, której potrzebujesz i dodaj HTML Block (pod blokiem z formularzem CRM)
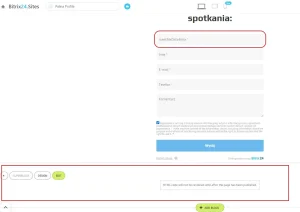
Krok 3. Wypełnij ten blok skryptem, zapisz i opublikuj stronę.
Krok 2. Wstaw skrypt formularza Bitrix24 CRM do kodu swojej strony internetowej (CRM – Więcej – Dodatki – Formularze CRM – wybierz ten, którego potrzebujesz i skopiuj kod)
Krok 3: Po kodzie formularza skopiuj skrypt widżetu z aplikacji (patrz krok 1) i wklej go poniżej.
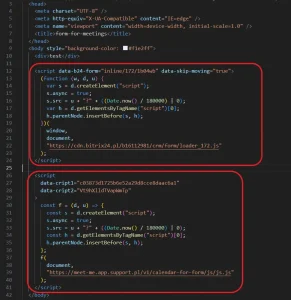
9. Następnie przystępujemy do edycji formularza CRM, poprzez który klient dokonuje rezerwacji.
Dodaj pole meetMeDateBitrix z encji Kontakt (zostało dodane automatycznie podczas instalacji aplikacji).
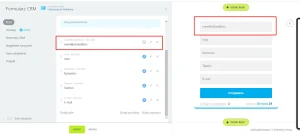
Ważne: Jeśli w ustawieniach określiłeś, że widżet ma być umieszczony na górze formularza, ważne jest, aby dodać pole aplikacji na górze samego formularza. W przeciwnym razie aplikacja może nie działać poprawnie!
Rezerwacje przechodzą do sekcji CRM Klienci.
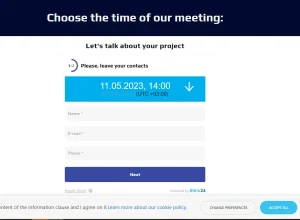
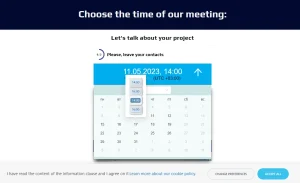
Na karcie klienta zobaczysz również nowe pola (dodawane automatycznie podczas instalacji aplikacji):
– meetMeTZClient – strefa czasowa klienta jako string
– meetMeTZClientOffset – przesunięcie strefy czasowej klienta w sekundach
– meetMeDateClient – data klienta
– meetMeTzBitrixOffset – przesunięcie strefy czasowej w ustawieniach slotów, w sekundach
– meetMeTzBitrix – strefa czasowa w ustawieniach slotu, string
– meetMeDateBitrix – Data rozpoczęcia Bitrix24, w ustawieniach slotu. Również to pole należy umieścić w formularzu
– meetMeDateToBitrix – data końcowa w Bitrix24, w ustawieniach slotu.
– meetMeIdEmployee – identyfikator pracownika
– meetMeIdOwner – identyfikator właściciela kalendarza
– meetMeIdCalSet – identyfikator kalendarza do tworzenia slotów
– meetMeIdCalMeet – identyfikator kalendarza do tworzenia spotkań.
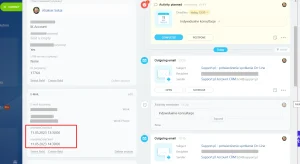
i tworzona jest sprawa.
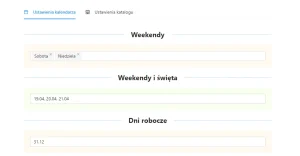
1.Przejdź do zakładki “Rezerwacja”
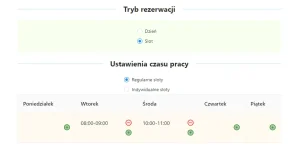
2.Zdefiniuj podstawowe ustawienia
3.Wybierz typ rezerwacji
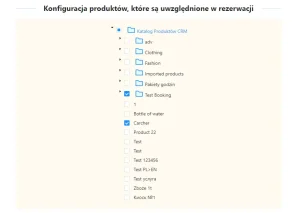
1.Przejdź do zakładki “Ustawienia katalogu” i wybierz żądany katalog
2.Dodaj wymagane pola do wyświetlenia
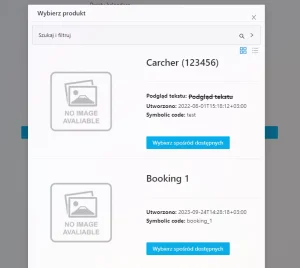
3.Wybieranie produktów do rezerwacji
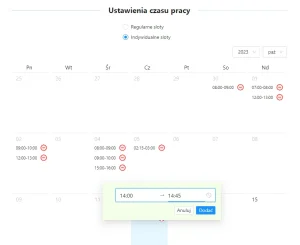
1.Utwórz przedział czasowy, dla którego chcesz autoryzować rezerwację
2.Wybierz pozycję, aby uzyskać dostęp do kalendarza rezerwacji
Przejdź do zakładki Rezerwacja/Ustawienia katalogu
3.Wybierz opcję “Booking”, aby otworzyć kalendarz rezerwacji
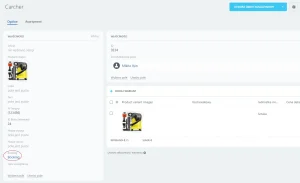
4.Wybierz wcześniej utworzony slot, aby dokonać rezerwacji czasu
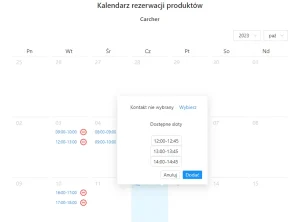
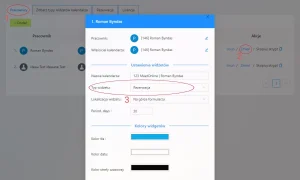
1.Przejdź do zakładki “Wyświetl typy widżetów kalendarza” i wybierz “Rezerwacja”
2.Kliknij przycisk “Rezerwacja”, aby wyświetlić podgląd widżetu
3.Aby podłączyć widżet
Pracownicy → Akcje/Zmień → Typ widżetu/Rezerwacja
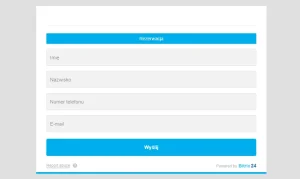
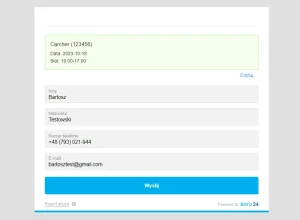
1.Klienci przechodzą do formularza
2.Następuje wybór wymaganego slotu
3.Po potwierdzeniu tworzona jest transakcja i wysyłane są powiadomienia do osób odpowiedzialnych. Klient może również otrzymać automatyczną wiadomość e-mail z potwierdzeniem zawierającą plik .ics, umożliwiający dodanie spotkania do swojego kalendarza (Google, Outlook).
Ważne! Podczas dodawania pracownika generowane są 2 kalendarze:
– Calendar Set to kalendarz, w którym właściciel kalendarza dodaje dostępne przedziały czasowe do rezerwacji, spośród których klient wybierze termin spotkania.
– Meet Calendar to kalendarz spotkań zarezerwowanych przez klientów.
