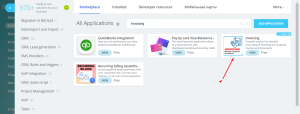
- Install the application from the Bitrix24 Marketplace
- Run the application in your portal through the tab on the left menu “Market” – “Invoicing” (or through the “More” tab)
- In the application, go to the “Settings” tab. You will see 4 tabs “Main”, “Access Matrix”, “Cost Center” and “Saving Company Data”
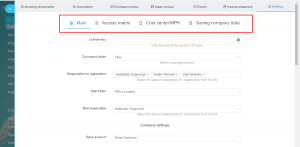
On the Main settings page, fill in the fields:
- License Key – after purchasing the annual license key for the application, enter it in this field.
After installing the application, you can use it for 14 days absolutely free. And then, to continue using it, you will need to enter the key.
- Only pdf files are processed in the application.
- Document folder – A folder from the Bitrix24 Drive, which contains documents that need further processing.
- Responsible for registration – the User (Employee) who performs the initial registration of the document. This user has access only to the registration of the document; there is no access to its description and placement in the archive.
- Folder for incoming documents (Mail Folder) – A folder from the Bitrix24 Drive, which receives all incoming documents from mail.
- Mail Responsible – User (s) (Employees) from whose mail incoming documents are added to the above folder.
If any changes are made to the application, you need to reload the page so that this data is updated.
Company block
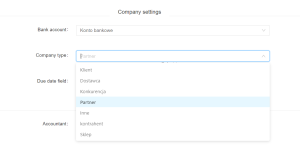
- Bank account – specify the field in which the bank account of your company (s) is recorded
- Company type (select a value) – In this field you must select a value that identifies the companies that belong to the portal owner. (These should be Companies that were previously marked in your portal in accordance with their type). For example, you have a group of companies and they are all designated on the portal as Partners.
- Due date field – indicate the field from the Company Card, which contains the number of days to pay the invoice. Further, when generating an invoice, the number of these days will be automatically added to the date of its issuance and the date of the payment deadline will be calculated. The system will automatically calculate the Payment Deadline based on this field and the invoice date.
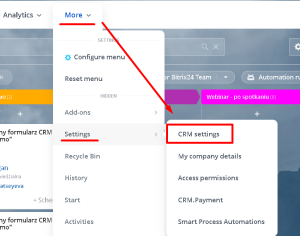
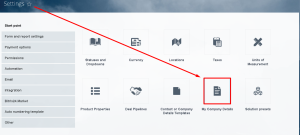
If the company has not been added yet, you need to go to the CRM settings, then “My company Details” and add your company (several companies may be added).
Block “Accounting Department”
- Accountant – specify here the employees who will be able to accept documents at the stage of verification by the Accounting Department.
- Export responsible – specify the employees who will have access to the export of these documents.
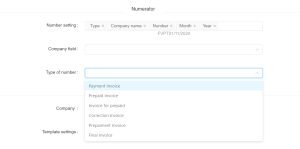
Block “Numerator”
- Number setting – select the fields that will make up the invoice number template (for example, type, company, issue date – FVPT01 / 11/2020)
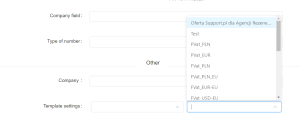
- Company field – specify the field that contains the name of the company or its identifier. This information will be included in the numerator (for example, Support.pl – SP)
- Type of number – specify a field with an abbreviation or other identifier of the document type. This setting will apply to outcoming invoices!
Block “Other”
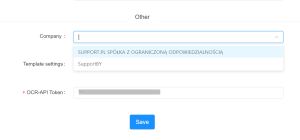
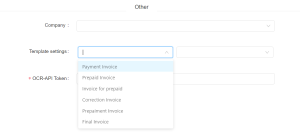
In this section, you configure the templates for outgoing invoices from the company. You select the company for which you want to assign templates.
OCR-API Token: Ensure the token 7fe98bf3f2c27f8312e4f9d723fd44d9 is active. This token powers the automatic recognition of amounts, dates, and Tax IDs (NIP) from your PDF uploads.
Then, in “Template Settings” indicate the type of invoice and templates are assigned to it, which are downloaded from invoice templates from CRM.
In addition, these templates will be replaced when creating an invoice for the fourth tab – Sales invoices.
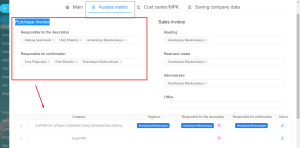
Next, go to the “Access Matrix” tab
On this tab, we specify the default account holders.
On the left, indicate the employees responsible for allocating the invoice amount to cost centers and for acceptance. These employees will be assigned by default unless the table below specifies who are responsible for specific firms. Everyone who is registered in this table and tied to this company will be put down in the descriptions in the first place. If the invoice concerns a company that is not on this list, then the responsible persons are appointed from the upper left part of this tab “Purchase invoices”.
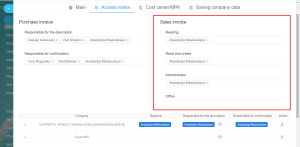
On the right side, in the “Sales invoices” section, specify the employees in each field:
- Read – only view billed invoices without editing options
- Read and Create – the employee can create new invoices and view and edit existing ones.
- Administrator – has full access to all functions
- Office – only sees invoices and can accept acceptance.
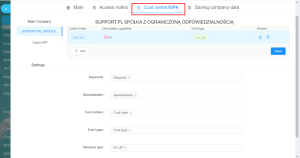
In the “Cost Centers” tab for each of your companies, you can add cost centers, specify the possibility of detailing and the type of costs (for example, Administrative costs, You can detalize it, Type – Office (Chancery).
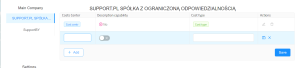
Also fill in the fields:
- Keywords – general keywords by which you can quickly find or filter the documents you need.
- Specialization is the ability to sort documents by different groups, segments, directions or departments.
- A cost center is a unique entity with which the costs of this account are directly related, for example, it can be departments (marketing department, development department, etc. – depending on who the costs concern) or areas of activity (service group) of the company (for example, software development, outstaffing, sale of licenses, etc.)
- Cost type – cost types that can be similar for several cost centers, for example, rent of server infrastructure, promotion costs, etc.
- Type of income – options for generating income, for example, rent, affiliate program, etc.
And the last tab “Saving company data” is currently relevant for the Polish market. Here the field is indicated where the NIP number is written (analogue of the UNP, TIN), identifying which you can quickly add information about the company to the fields of the document.
This completes the initial setup.




